

The time has come to switch gears. After many weeks of Excel tips, we are moving on! I'm taking a...
To double down on my nerdiness, let me let you all in on a little secret - I love, and I mean LOVE working in Excel spreadsheets. I don't know what it is about it.....something about all the data and organizing it. Really, I should admit that I'm an organizing geek, not an Excel geek, but you know....not mutually exclusive.

Anyway.....so, sometimes when I start working on a new project and I decide to use Excel to organize things, I may get so excited to do so that I don't think things through. I start labeling columns and putting things in rows and I get a lot done really quickly before I realize....wait! I don't want this information to be in a row. I want it to be in a column!
And I get a little sad, thinking I've wasted precious organizing time.

Until I realize there is a super simple fix for this! Don't you love when I come to you guys with super simple fixes??? I know I do.

You'll start by highlighting the data you want to move around and copy it. You can click CTLR+C, you can right click and hit Copy. You can use the copy icon. Whichever way you so desire.

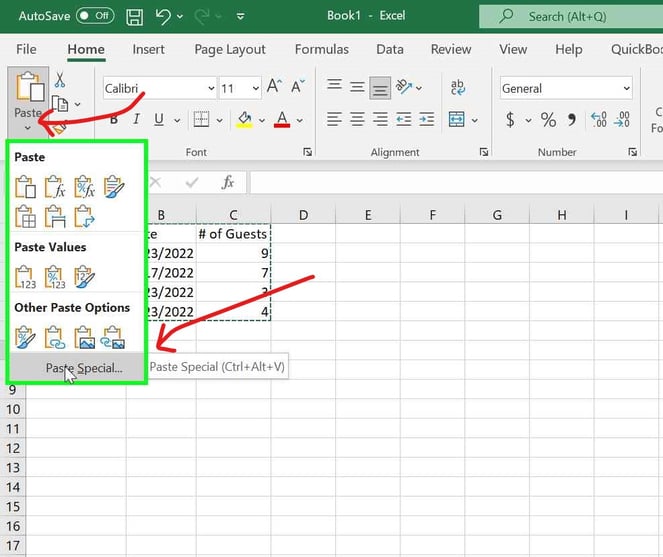
Then you want to select the cell where you want to put the data. Once selected, you want to click on the drop down menu under Paste (make sure you are on the Home section of the menu). In the drop down, select Paste Special.
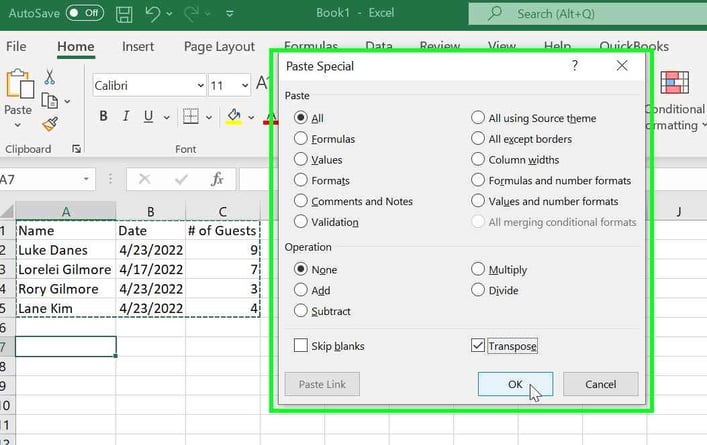
This will open up a new window - you want to make sure you click the box that says Transpose and then click okay.
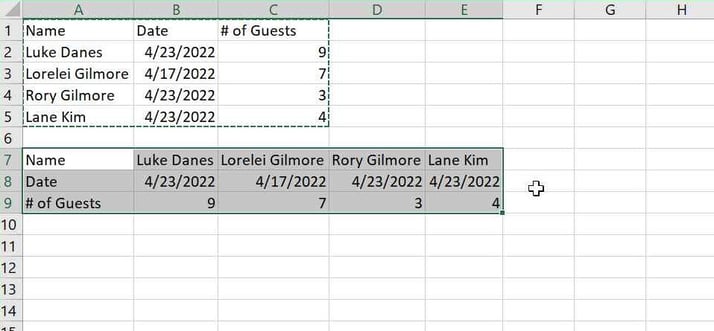
And voila! Rows and columns have been swapped! You can keep both sets of data or delete the one you don't want. Up to you!
But whatever you do, make sure to save your work! No one likes to lose their precious organized data!