
I currently feel like a much bigger deal than I actually am. It’s Vlogger Syndrome. Trust me.
Hey guys. Remember a few months ago when I did a series on Microsoft Teams? Wasn’t that fun? And educational? And enlightening? Pretty much the best time of your 2021?

Well I enjoyed it so much that I decided it was time to do another series!
This time around, I’m focusing on Microsoft Excel. Most people who use Excel know that they can organize their data in neat and tidy rows or columns. However, I think a majority of Excel users aren’t aware of how many functions Excel has that can make their job so much easier and keep them more organized. So I’m going to spend some time over the next several newsletters highlighting some tools you may not be aware of in Excel.

This week, I’m focusing on when you want the same text in multiple cells.
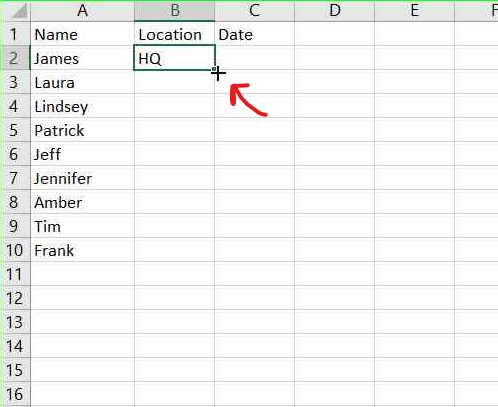
The first scenario I’m going to cover is when you want a column or row to have the same text in multiple cells in a row. Type what you want in the first box and then hover over the bottom right corner until the fill handle appears – it’s a plus sign!
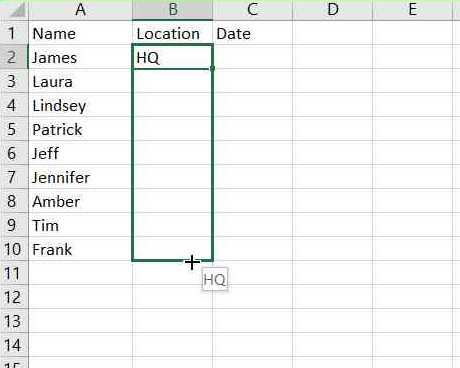
When you see the +, click and drag down (or across) through all the cells you want to have the same text.
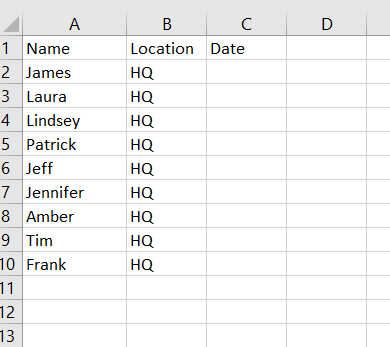
Once you release the mouse, the text from the first cell will auto fill through all of the selected cells.
Okay – but what if you want the same text in multiple cells that aren’t all in a row? Well, have no fear – there’s an option for that too!
You will want to hit CTRL and keep holding it while you select all the cells you want to have the same text.
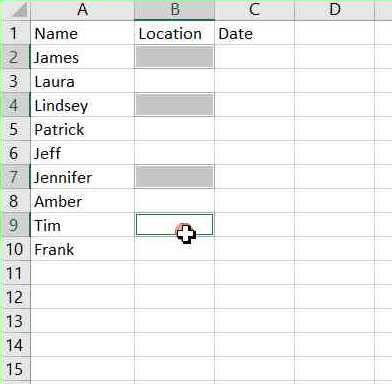
Once all cells are selected, in the last cell that you selected you will want to type your text.
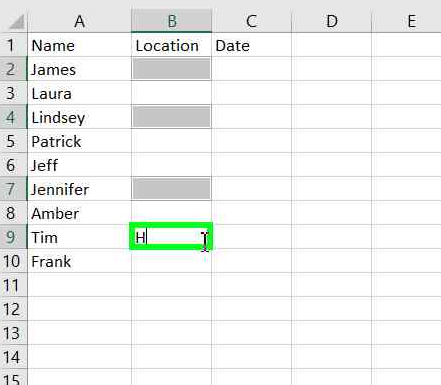
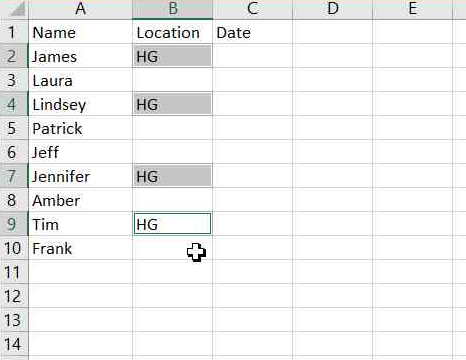
Once you’ve completed typing your text, hit CTRL + Enter at the same time (not just Enter. If you hit just Enter, it will do nothing magical whatsoever). Once you hit CTRL + Enter, the text will auto fill in all of your selected cells.
Join me next time for a discussion about how numbers play with these functions just a little differently!