
Have you guys met my friend, the scroll wheel of the mouse??
I don't know about you guys, but the holiday's took it out of me this year! So I'm easing into the New Year nice and easy in all areas of my life.

Okay, that's a lie. I don't have that luxury. But I AM going to go nice and easy as I start back into the Microsoft Word series. I honestly am not sure how many more there will be in this series, but we'll keep trucking along!
.jpg?width=311&height=162&name=download%20(3).jpg)
This week, I'm going with a simple tip that can come in handy if you need to put a specific picture into your Word document. And I'm specifically talking about if you need to put a picture of something that you have on your computer screen. You may be familiar with the term "screen shot" - which is basically exactly what it sounds like - a shot of your screen.

You may need to include a section of a report from Quickbooks, or a graph from Excel. Or maybe you just want to share a meme from Facebook without having to save it first.
.jpg?width=220&height=146&name=download%20(4).jpg)
There is a very simple way to do this in your Word document. When your cursor is in the place in the document that you need the image, you simply go to the "Insert" tab of the menu. Here you will see "Screenshot" in the Illustrations section.

Once you click on the Screenshot dropdown, you will actually see every Window you have open on your computer as an option.
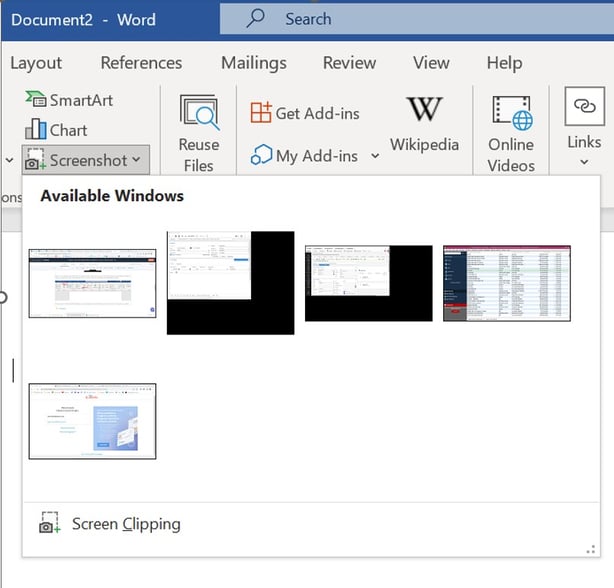
You click on whichever screen you want in your document and it will put it right in! Then you can crop it, center it, resize it - whatever you'd like to do to make it look the way you want.