
Have you ever tried to wrangle cats?
Do you ever find yourself in the following situation?

You are talking to a co-worker, trying to explain a problem that you are having with a program on your computer. You can’t quite explain what’s going on – you stumble over your words as you try to describe it.
You have flashbacks to taking your car to the mechanic and making noises that no human should have to make in order to let them know what it sounds like.

In those moments, don’t you just long for the days of Talkboys when you could record the sound and play it back for them?

Is there a visual equivalent of that for when you need to show someone something on your computer that you can’t explain?
Why yes! Yes there is.

And I’m not talking about a fancy remote tool like what we here at In Motion use to connect to your computers. I’m talking about something that you already have!
In Teams, you can share your screen with someone else that you are chatting with.

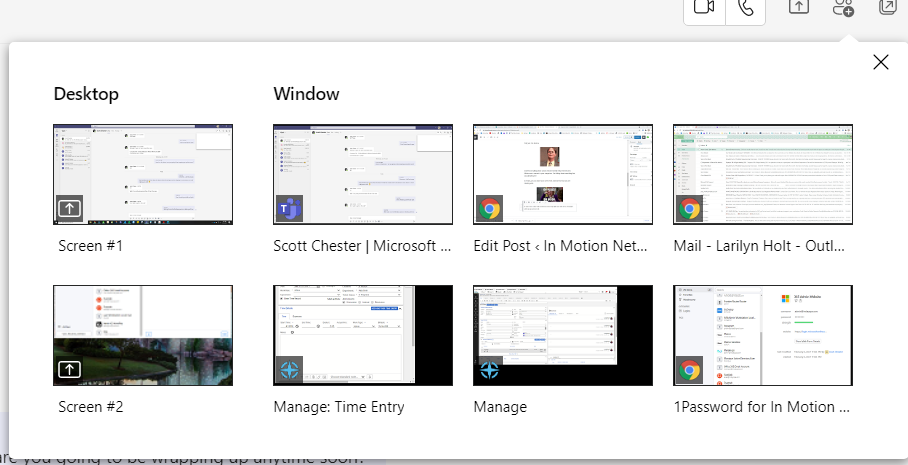
If you’re in a chat with someone, in the top right you will see a rectangle with an up arrow in it. You click on this to share with the chat (and this can be a one on one chat, or a group chat).

You then can select whether you want to share your entire screen, or a particular window (for example, just your Quickbooks application, or your Chrome application). You will see all of the options. You just select the one you want to share.
Then the other user (or users) in the chat will get a notification that you want to share your screen and they can accept it – almost like answering a call.
When you are done, just select Stop sharing!
You can also share your screen during calls or meetings. And if you do that, you can include the audio from your computer. You simply select “Include Computer Sound” in the controls section at the top. That way everyone can hear your favorite bagpipe concerto that you have playing in the background!